Tips to prevent Frozen Pipes and How to Thaw Pipes

sassercompanies-snow

Winter has stormed into the Piedmont, bringing snow, ice and plummeting temperatures that can wreak havoc on plumbing.

A ruptured water line can cause extensive, costly damage and disrupt your life or business. Even worse, flood water can pose numerous safety and health risks, ranging from electrical shock to illness from waterborne pathogens or even toxic mold.

With your family or business on the line, you want to do everything you can to prevent water from freezing inside your plumbing. But if you do think a pipe is frozen, don’t panic; frozen pipes don’t always rupture, and there are steps you can take to prevent pipes from bursting and safely thaw them.

A frozen pipe will not necessarily burst if the faucet valve is open to release pressure moving down the pipe.

Start with prevention

We’ll go into tips for thawing pipes below, but let’s start with steps you can take right now to reduce the risk of frozen pipes. Make sure you winterize your property outdoors, draining pools and irrigation systems and hoses, insulating and covering outdoor faucets and securing doors and windows in garages and outbuildings with water supplies. Also, be sure to follow these tips from the American Red Cross:

  • Check around the home for other areas where water supply lines are located in unheated areas. Look in the basement, crawl space, attic, garage, and under kitchen and bathroom cabinets. Both hot and cold water pipes in these areas should be insulated.
  • Open kitchen and bathroom cabinet doors to allow warmer air to circulate around the plumbing. Be sure to move any harmful cleaners and household chemicals up out of the reach of children.
  • When the weather is very cold outside, let the cold water drip from the faucet served by exposed pipes. Running water through the pipe, even at a trickle, helps prevent pipes from freezing.
  • Keep the thermostat set to the same temperature both during the day and at night. By temporarily suspending the use of lower nighttime temperatures, you may incur a higher heating bill, but you can prevent a much costlier repair job if pipes freeze and burst.
  • If you will be going away during cold weather, leave the heat on in your home, set to a temperature no lower than 55° F.

If pipes freeze, don’t be alarmed, do this:

If you wake up one morning and the water won’t come on in your kitchen, don’t panic. While horrifying visions of water filling crawl spaces and mold spores sprouting may be unavoidable, a frozen pipe will not necessarily burst if the faucet valve is open to release pressure moving down the pipe. Take a deep breath, then follow these American Red Cross tips to safely thaw your pipe:

  • If you turn on a faucet and only a trickle comes out, suspect a frozen pipe. Likely places for frozen pipes include against exterior walls or where your water service enters your home through the foundation.
  • Keep the faucet open. As you treat the frozen pipe and the frozen area begins to melt, water will begin to flow through the frozen area. Running water through the pipe will help melt ice in the pipe.
  • Apply heat to the section of pipe using an electric heating pad wrapped around the pipe, an electric hair dryer, a portable space heater (kept away from flammable materials), or by wrapping pipes with towels soaked in hot water. Do not use a blowtorch, kerosene or propane heater, charcoal stove, or an open flame.
  • Apply heat until full water pressure is restored. If you are unable to locate the frozen area, if the frozen area is not accessible, or if you cannot thaw the pipe, call a licensed plumber.
  • Check all other faucets in your home to find out if you have additional frozen pipes. If one pipe freezes, others may freeze, too.

Source: American Red Cross

These tips should help minimize the risk plumbing ruptures from frozen pipes. But sometimes nature simply shoves aside our best efforts and the worst happens. If you find yourself facing a water damage catastrophe from frozen, ruptured pipes, contact Sasser Companies at (336) 449-1144, our crews are available 24 hours, 7 days a week. You’ll talk to a real staff member, and professional help will be on the way.

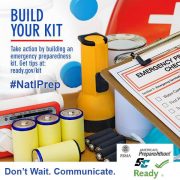
Build a Kit

A basic emergency supply kit could include the following recommended items:

  • Water, one gallon of water per person per day for at least three days, for drinking and sanitation
  • Food, at least a three-day supply of non-perishable food
  • Battery-powered or hand-crank radio and a NOAA Weather Radio with tone alert and extra batteries for both
  • Flashlight and extra batteries
  • First aid kit
  • Whistle to signal for help
  • Dust mask to help filter contaminated air and plastic sheeting and duct tape to shelter-in-place
  • Moist towelettes, garbage bags and plastic ties for personal sanitation
  • Wrench or pliers to turn off utilities
  • Manual can opener for food
  • Local maps
  • Cell phone with chargers, inverter or solar charger

Once you have gathered the supplies for a basic emergency kit, you may want to consider adding the following items:

  • Prescription medications and glasses
  • Infant formula and diapers
  • Pet food and extra water for your pet
  • Cash or traveler’s checks and change
  • Important family documents such as copies of insurance policies, identification, and bank account records in a waterproof, portable container.
  • Emergency reference material such as a first aid book or free information from this website.
  • Sleeping bag or warm blanket for each person. Consider additional bedding if you live in a cold-weather climate.
  • Complete change of clothing including a long-sleeved shirt, long pants and sturdy shoes. Consider additional clothing if you live in a cold-weather climate.
  • Household chlorine bleach and medicine dropper – When diluted, nine parts water to one part bleach, bleach can be used as a disinfectant. Or in an emergency, you can use it to treat water by using 16 drops of regular household liquid bleach per gallon of water. Do not use scented, color safe or bleaches with added cleaners.
  • Fire extinguisher
  • Matches in a waterproof container
  • Feminine supplies and personal hygiene items
  • Mess kits, paper cups, plates, paper towels and plastic utensils
  • Paper and pencil
  • Books, games, puzzles or other activities for children

Remember the unique needs of your family members, including growing children, when making your emergency supply kit and family emergency plan.

For Baby:

  • Formula
  • Diapers
  • Bottles
  • Powdered milk
  • Medications
  • Moist towelettes
  • Diaper rash ointment

For Adults:

  • Denture needs
  • Contact lenses and supplies
  • Extra eye glasses

Ask your doctor about storing prescription medications such as heart and high blood pressure medication, insulin and other prescription drugs.

If you live in a cold climate, you must think about warmth. It is possible that you will not have heat. Think about your clothing and bedding supplies. Be sure to include one complete change of clothing and shoes per person, including:

  • Jacket or coat
  • Long pants
  • Long sleeve shirt

To download a PDF version click HERE


*This list is compiled byFEMA and Ready.gov

Potential Fire Starters

No matter how careful you are, there’s a chance that your home is hiding a fire hazard – possibly even in plain sight. For the safety of yourself and everyone else that resides in your home, we hope that this list will prompt you to take a closer look at some of the potentially dangerous situations that can become more serious when left untreated or learn a few safer methods of dealing with common fire sources that can reduce the possibility that they will be the cause of a tragedy in the future.

BBQ Grills & Grilling

It probably goes without saying that both propane and charcoal started barbecue grills should never be used indoors; indoor use would pose a significant fire hazard as well as expose anyone in the enclosed space to toxic smoke and gases, and could rapidly cause lethal asphyxiation. You must also be sure you maintain proper safety anytime you grill outside.
● Always position your grill away from any siding, deck railing and out from under any overhead house eaves or tree branches.
● Your grill should be a safe distance from areas of high foot traffic or play areas.
● Make sure you keep the trays below the grill cleaned of grease buildup so it can’t be ignited unexpectedly.

Backyard Fire Pits

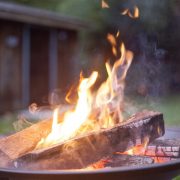
A simple fire pit, fire bowl, or chiminea, has become an increasingly popular backyard feature in the last few years, but there are always things to keep in mind when you actually go to start a fire in one. It’s probably most important to remember to think small – fire pits are more about creating ambiance than warmth and the larger the fire you build, the greater the potential for danger.
● Keep your fire pit at least 10 feet away from any combustible surface or structure.
● Avoid lighting a fire in windy conditions that could blow embers.
● Check weather forecasts and any local burn bans or ordinances that could be in effect for the season or in your region.
● Never start a fire in your outdoor fire pit without a source of water nearby in case of an accident.

Faulty Electrical Outlets and Wiring

Electrical fires can be caused in several ways, but most of them are the result of faulty electrical outlets or old, outdated appliances. Appliances with worn or frayed cords or faulty switches should be repaired or replaced immediately – those frayed or worn cords can send heat or sparks out onto floors, curtains, rugs or other commonly combustible surfaces and quickly start a fire that could quickly get out of control. If your home is over twenty years old, your wiring might need updating to handle the higher number of modern appliances in most homes now.

Lint Build Up in Dryer Vent

This is a source that always surprises people. Believe it or not, fires that begin in your clothes dryer due to built-up lint and dust in the lint trap account for a shocking amount of home structure fires and cause millions in property damage every year. The type of dryer you have makes a big difference; according to the U.S. Consumer Product Safety Commission, if you have an electric clothes dryer, your chance of fire is 250% greater than if you have a gas dryer.

Pet and Animal Emergency Planning

Make a Pet Emergency Plan:

  • ID your pet. Make sure your pet’s tags are up-to-date and securely fastened to your pet’s collar. If possible, attach the address and/or phone number of your evacuation site. If your pet gets lost, his tag is his ticket home. Also consider microchipping your pets.
  • Make sure you have a current photo of your pet for identification purposes.
  • Make a pet emergency kit.  Download Preparing Makes Sense for Pet Owners for a full list of items to include in your pets kit.

Check out this quick list:

  • Pet food
  • Bottled water
  • Medications
  • Veterinary records
  • Cat litter/pan
  • Manual can opener
  • Food dishes
  • First aid kit and other supplies
  • Identify shelters. For public health reasons, many emergency shelters cannot accept pets. Find out which motels and hotels in the area you plan to evacuate to allow pets well in advance of needing them. There are also a number of guides that list hotels/motels that permit pets and could serve as a starting point. Include your local animal shelter’s number in your list of emergency numbers.
  • Make sure you have a secure pet carrier, leash or harness for your pet so that if he panics, he can’t escape.